编译chromium
系统要求
- A mac, intel or M1
- Xcode
- The macOS SDK. 运行下面的命令来检测是不是已经安装
ls `xcode-select -p`/Platforms/MacOSX.platform/Developer/SDKs - An APFS-formatted volume (macOS系统的默认文件系统格式)
安装 depot_tools
下载 depot_tools
git clone https://chromium.googlesource.com/chromium/tools/depot_tools.git将depot_tools添加到环境变量PATH中
export PATH="$PATH:/path/to/depot_tools"获取chromium源码
新建chromium目录来放置源码, 需要大概100G的空间,如果没有,最后会因为空间不足而失败。
mkdir chromium && cd chromium拉取源码, 这个取决于你的网络速度,一般要几个小时,所以可以放到晚上拉取, 还有如果失败要重试,使用gclient sync命令
caffeinate fetch chromium配置build参数
通过GN工具生成.ninja配置文件,通过ninja工具编译
gn gen out/Default --ide=xcode添加dsym配置
add enable_dsyms = true out/Default/args.gn
编译Chromium
有5万多个文件需要编译,一般也需要3个小时以上,所以也可以放到晚上编译。
autoninja -C out/Default chrome运行编译好的Chromium
out/Default/Chromium.app/Contents/MacOS/Chromiumxcode调试Chromium
关闭xcode的source control
xcode -> preferences -> source control -> uncheck Enable Source Control不关闭这个会导致xcode卡死,因为chromium的源码太大了,xcode会一直在扫描源码,导致卡死。
生成Xcode项目
上面已经通过
--ide=xcode参数生成了Xcode项目,所以可以直接打开out/Default/all.xcodeproj项目
调试Chromium
打开Chromium
./out/Debug/Chromium.app/Contents/MacOS/Chromium打开xcode项目
直接打开
out/Default/all.xcodeproj项目, 直接选择automatically create schemes.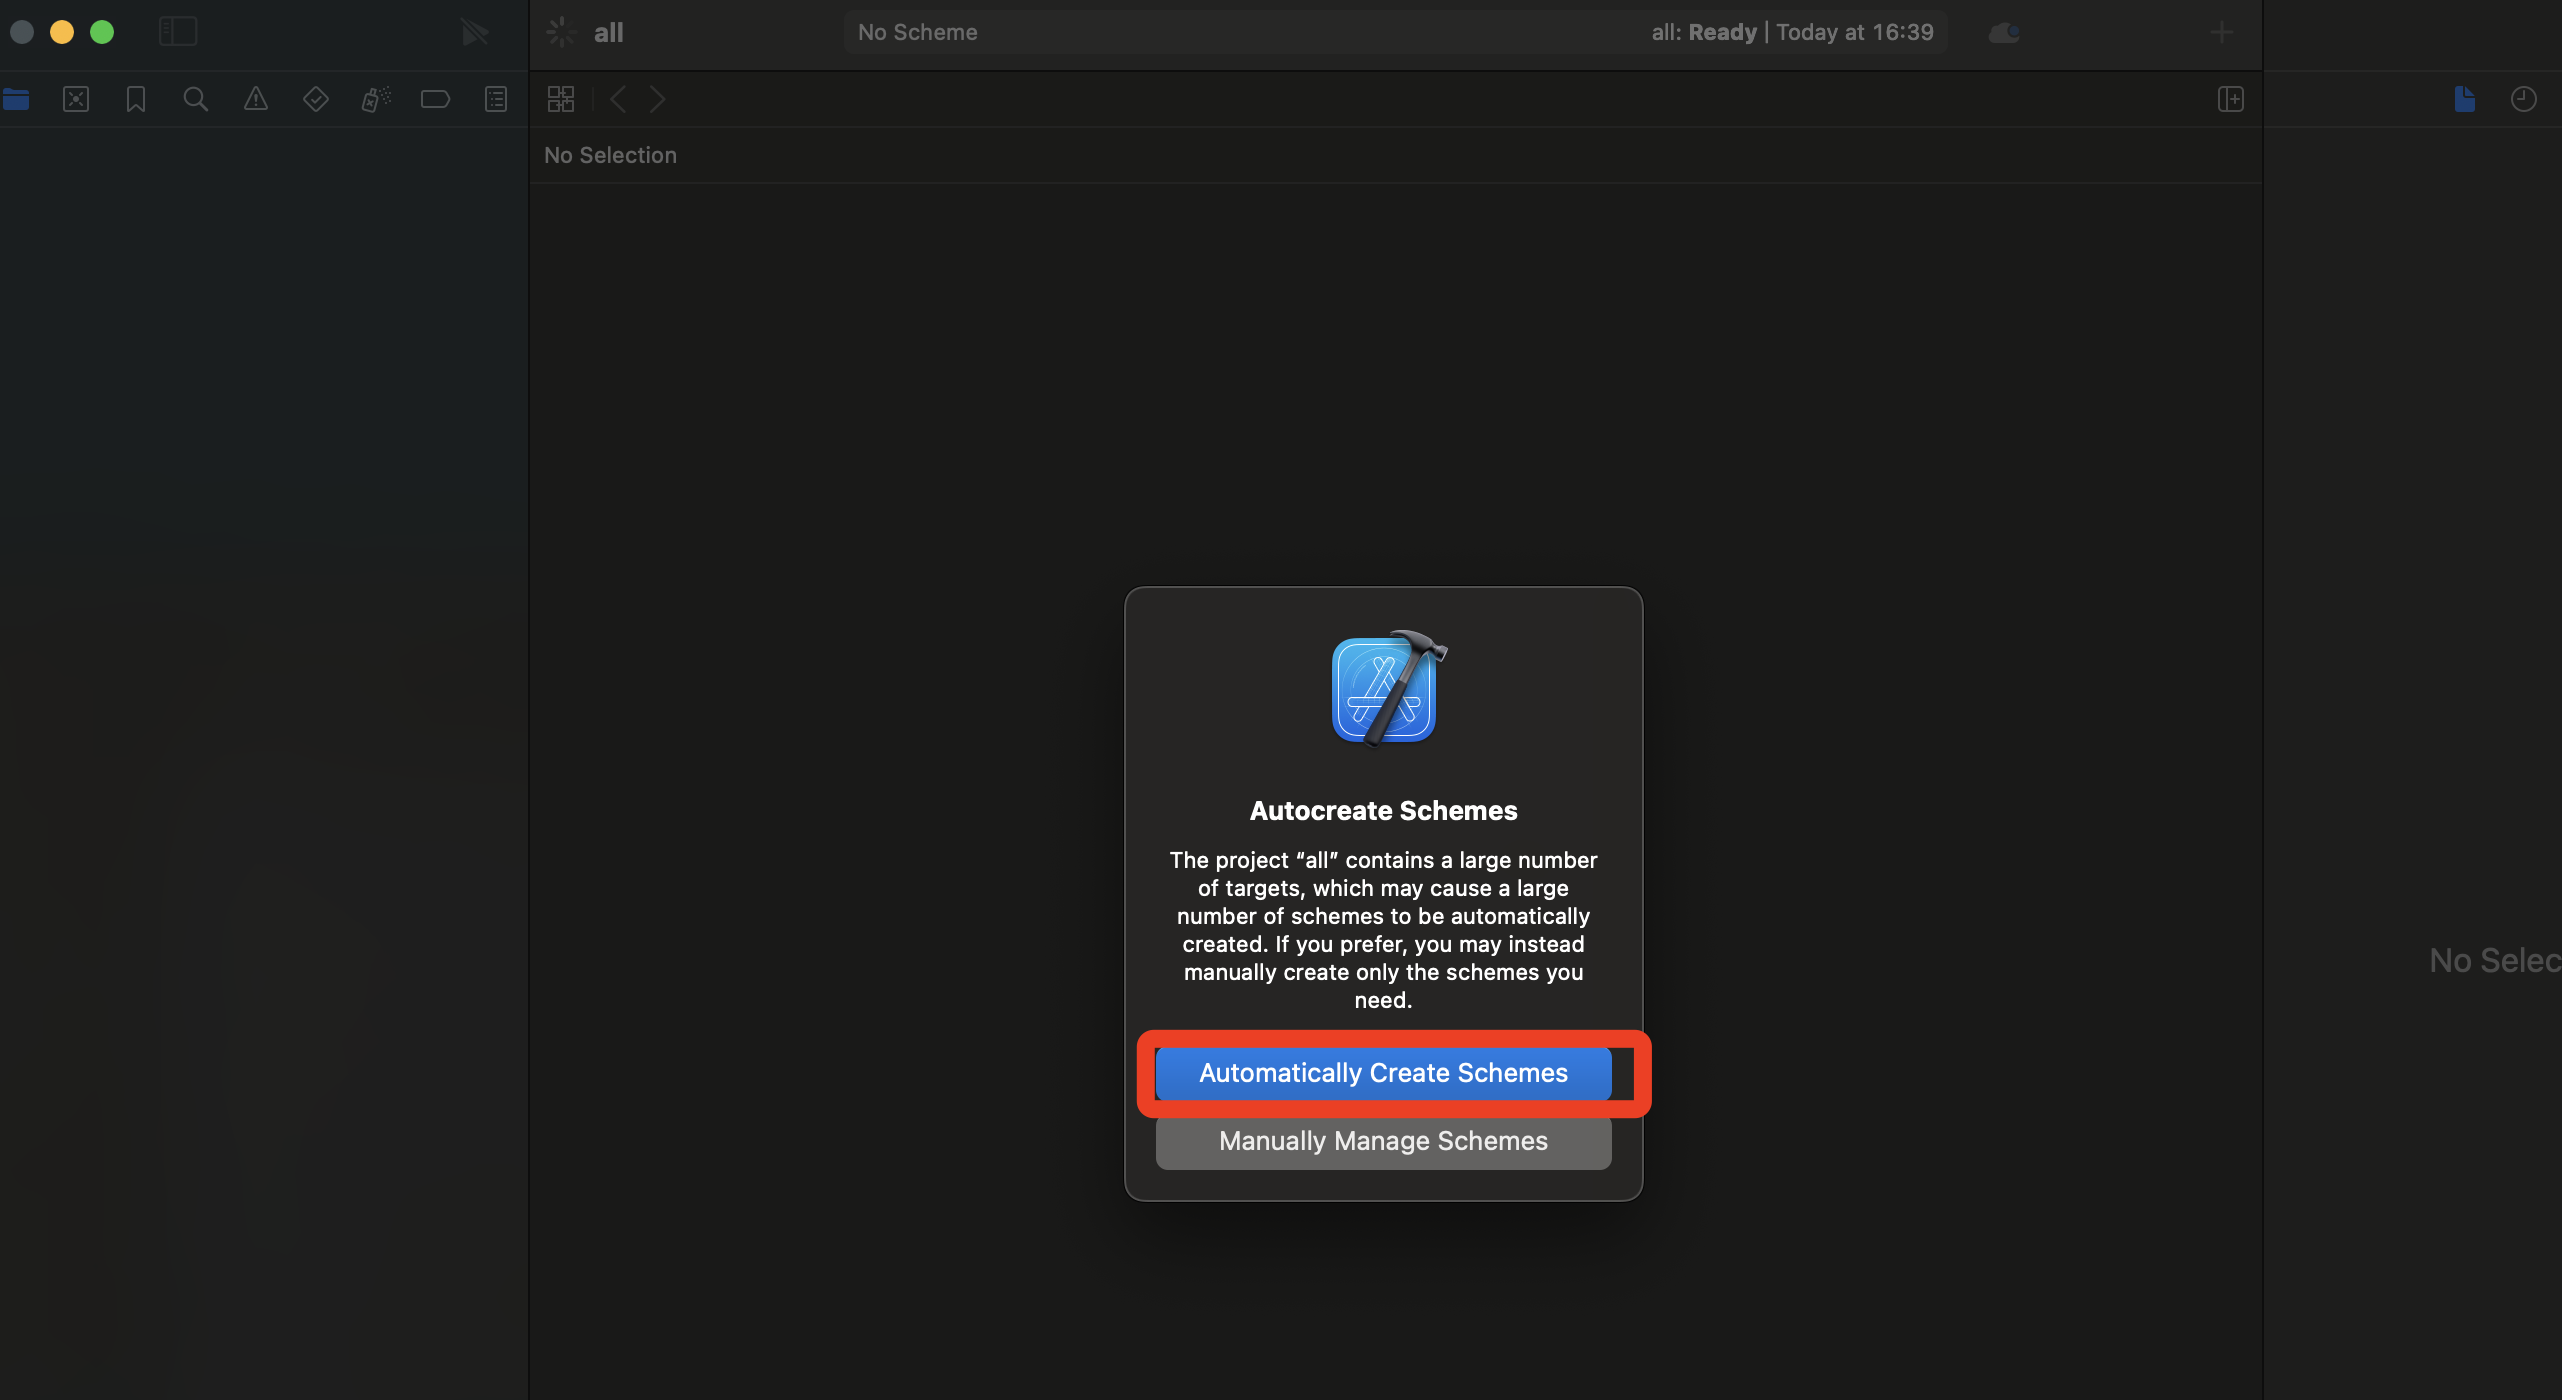
设置断点
在
chrome/browser/ui/views/tabs/new_tab_button.cc文件中的void NewTabButton::NotifyClick(const ui::Event& event)函数中设置断点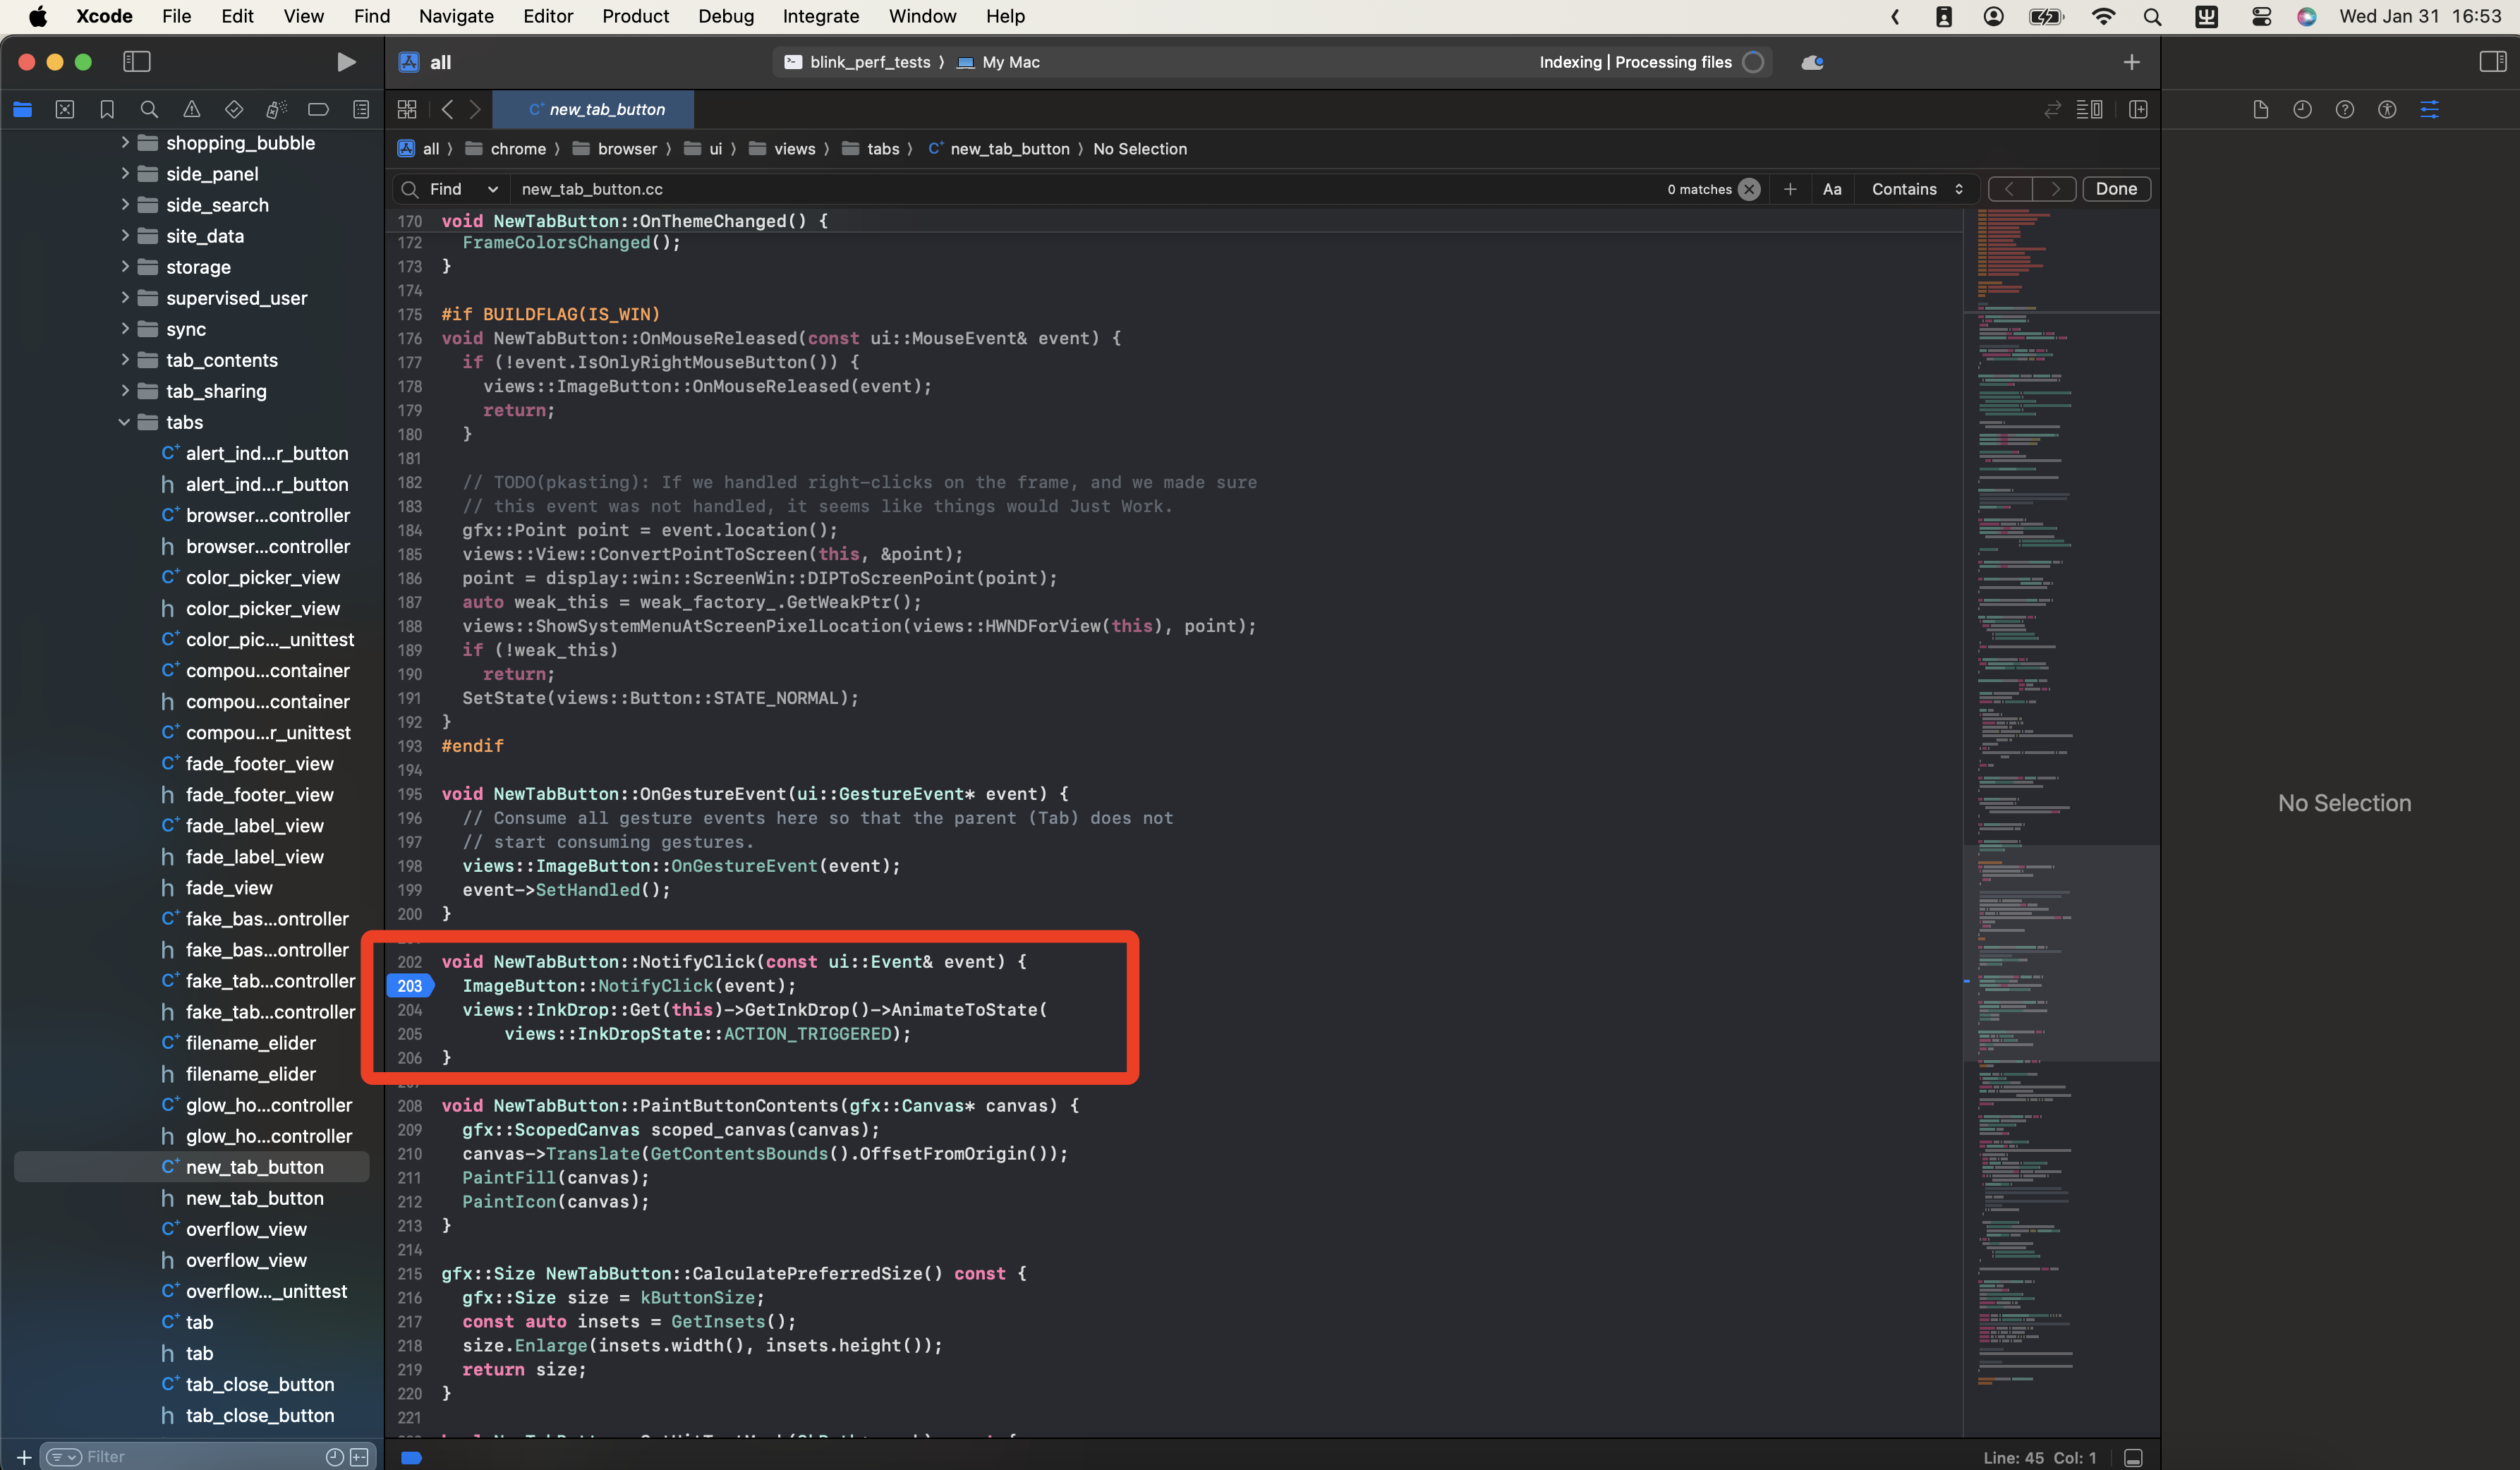
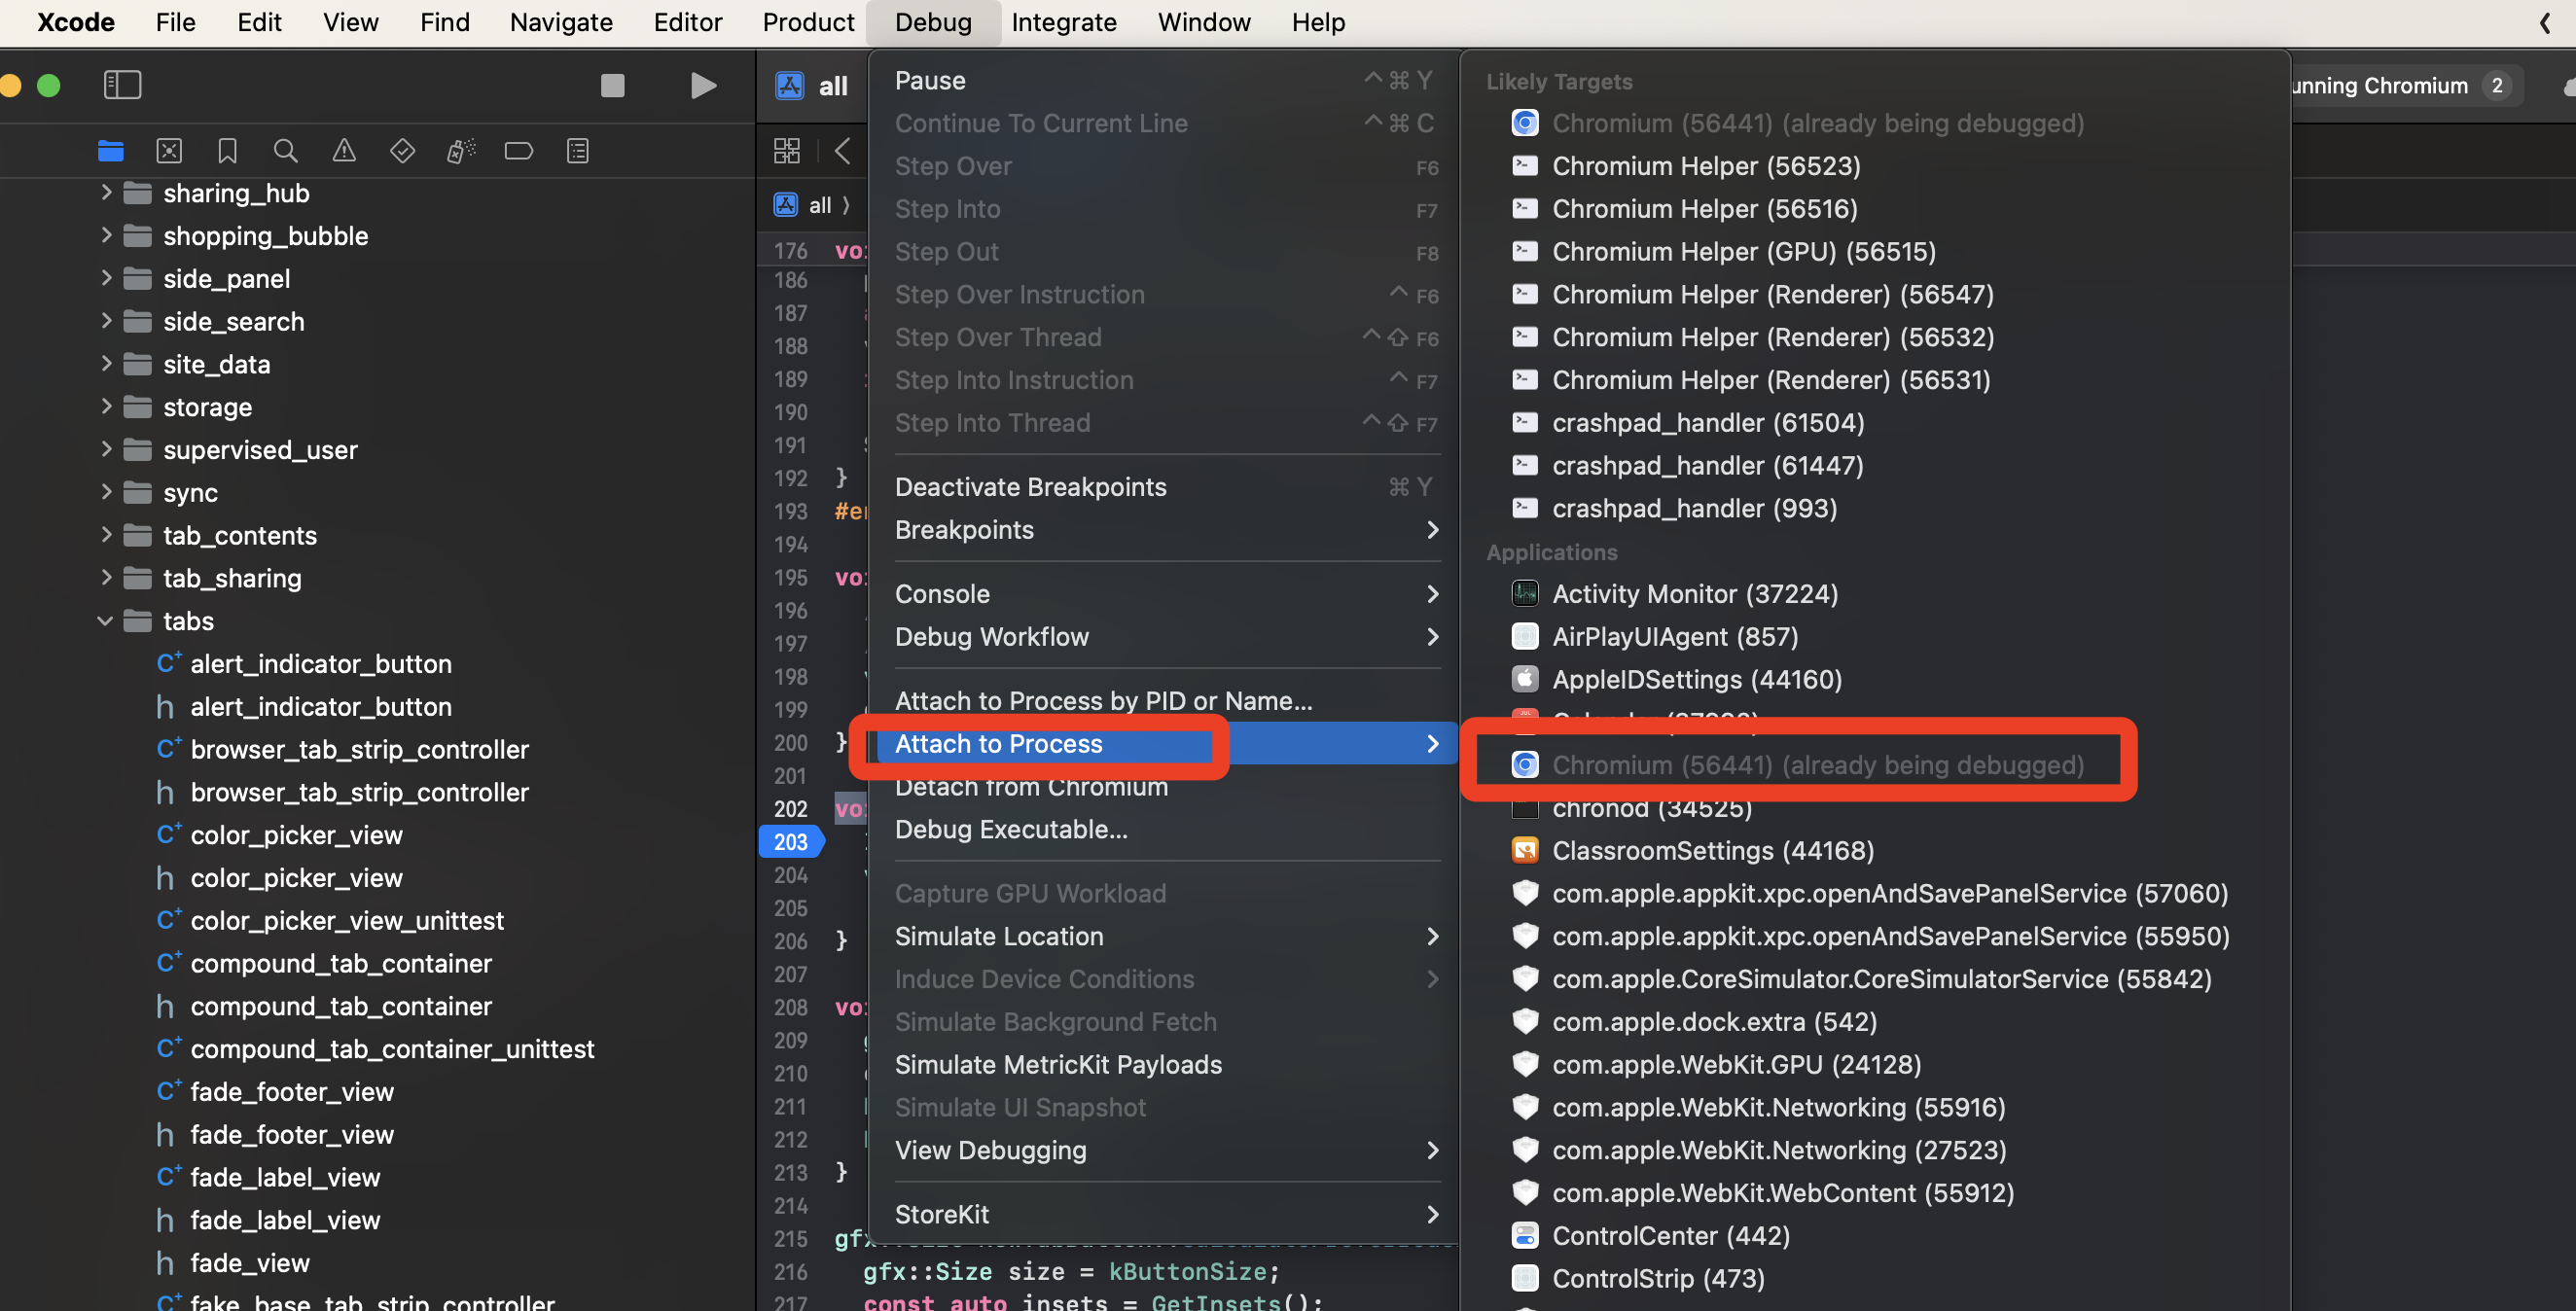
attach到Chromium进程
Debug -> Attach to Process -> Chromium这个需要等一会,等attach完成后,就可以在xcode中调试Chromium了。
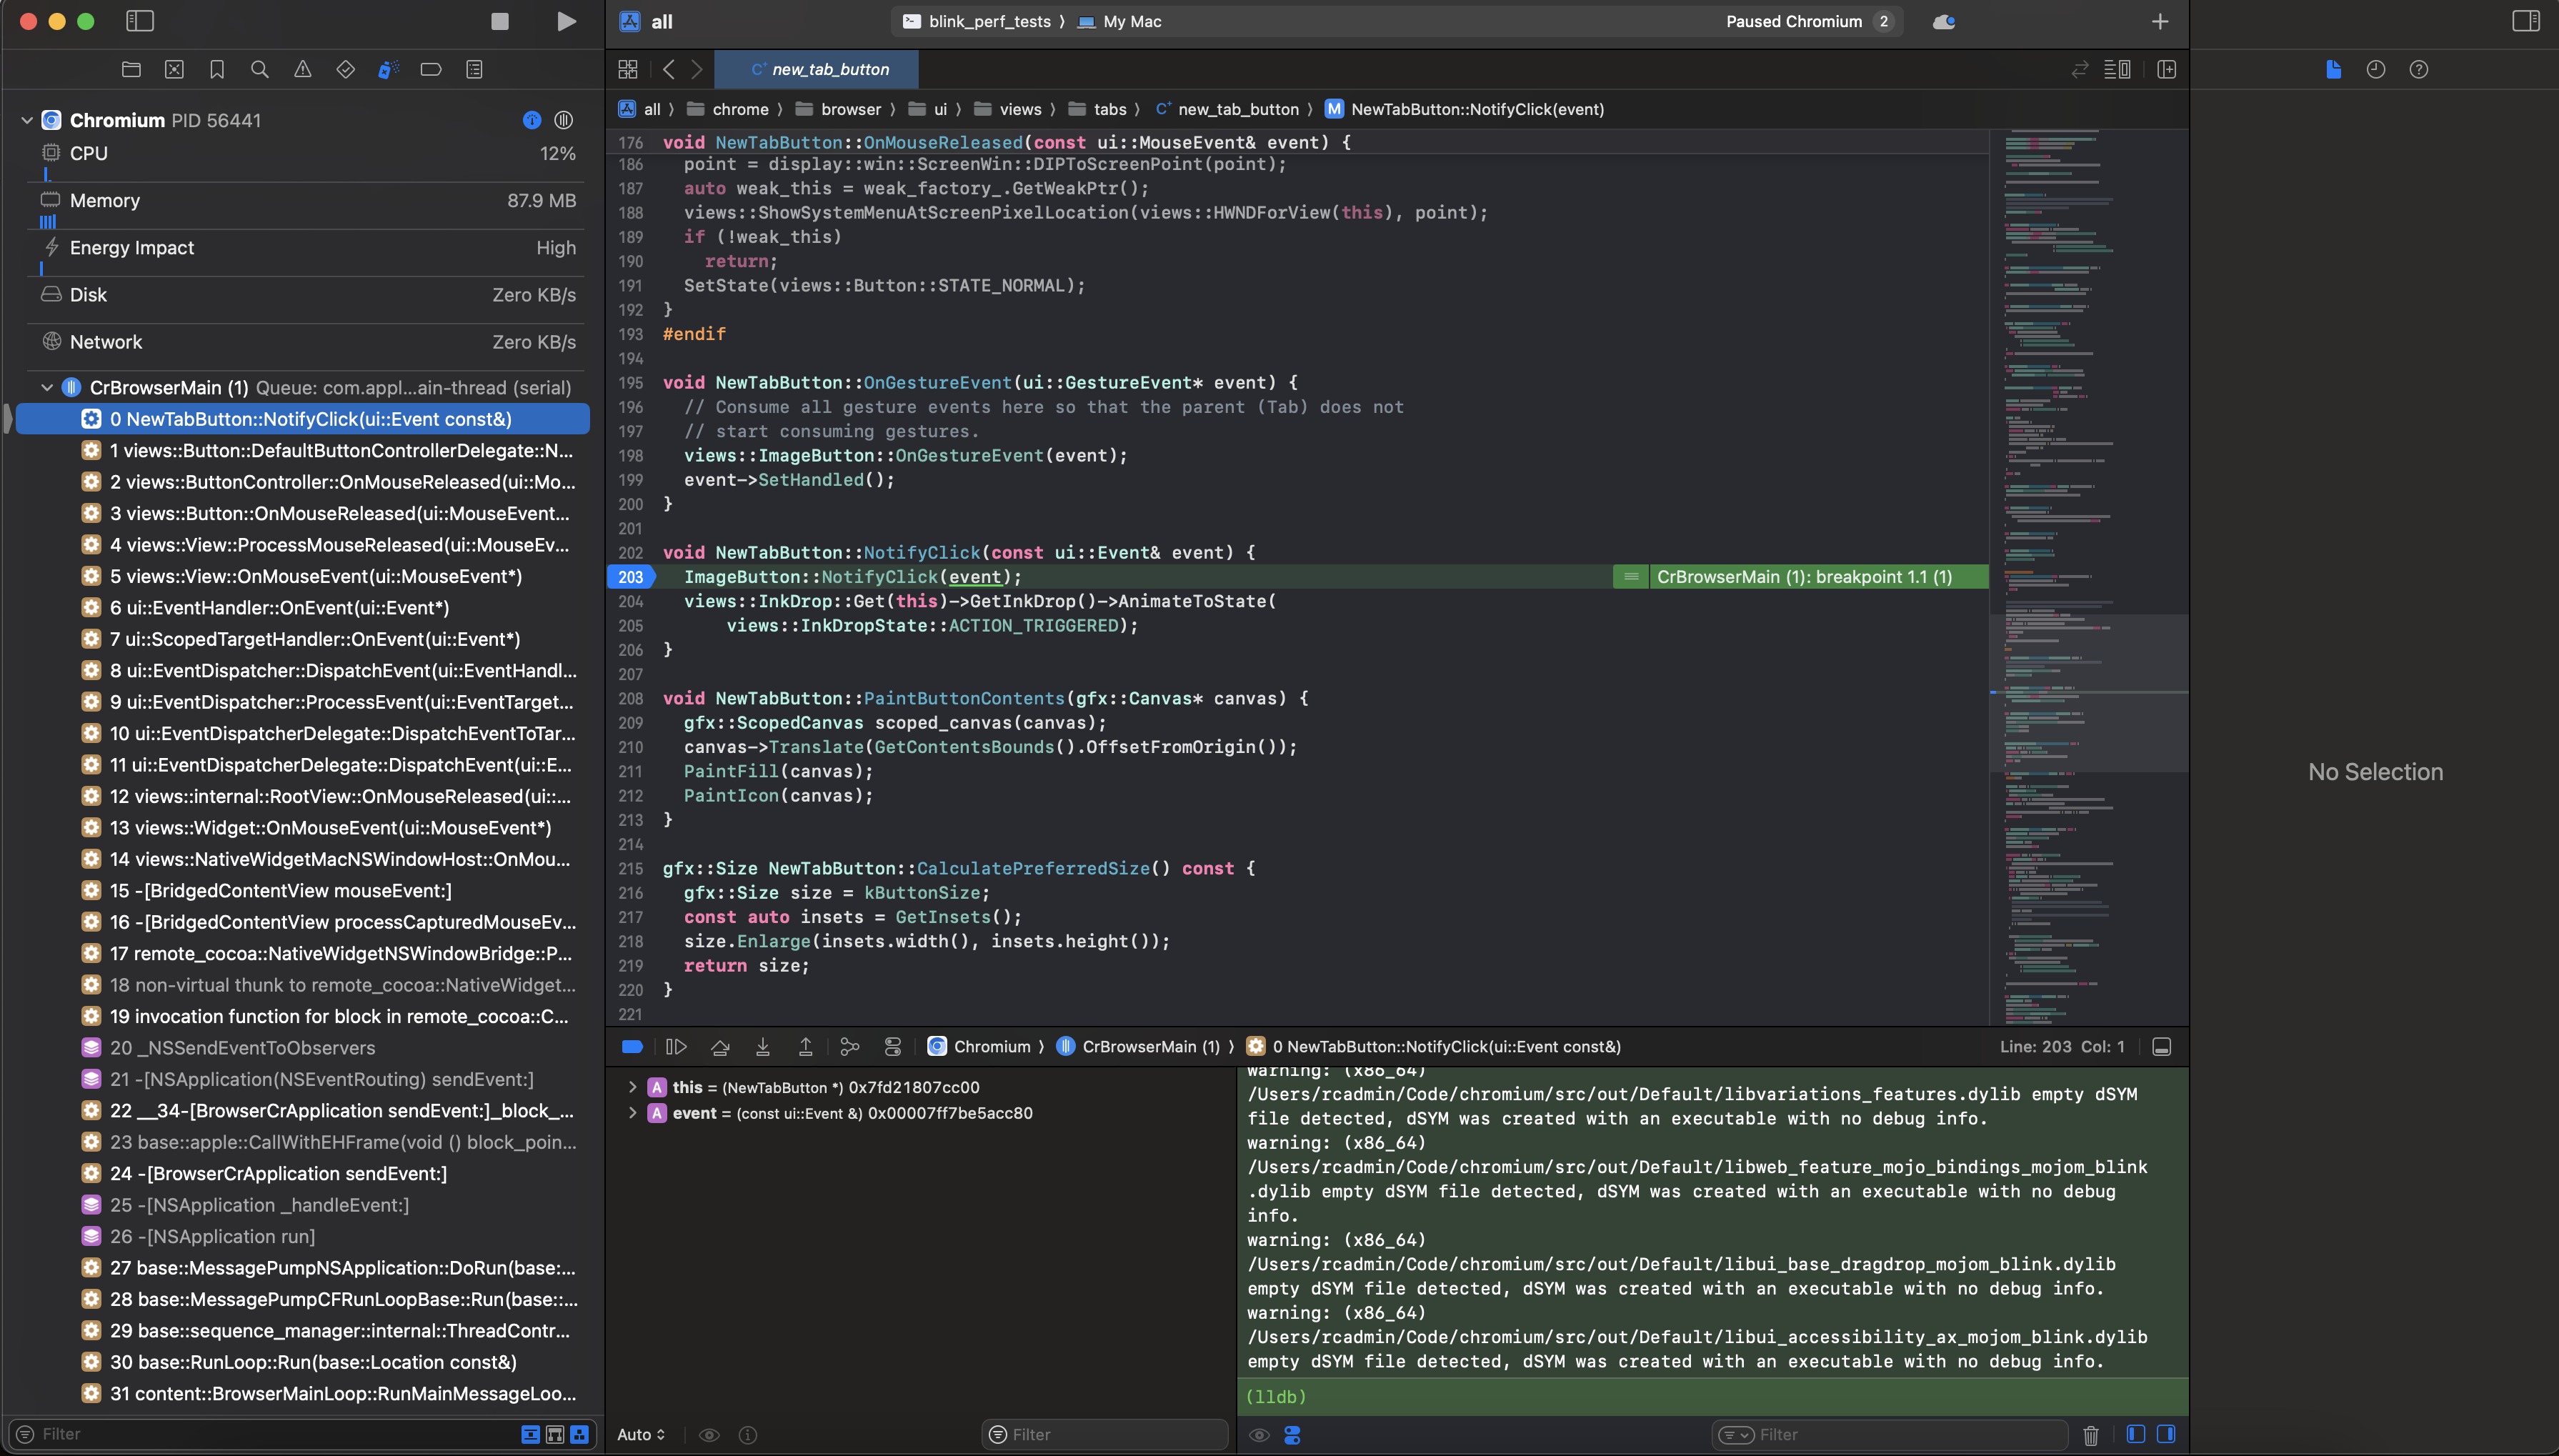
调试Chromium
在Chromium中打开一个新的tab,就会触发断点,然后就可以在xcode中调试了,如下图.